One of the best Scratch teacher tips I can share is to sign up for a Teacher Account and then make Class Studios to organize student projects. Scratch is an online coding platform that introduces programming skills to children using blocks. Students can independently sign up for their own accounts and use them to design and store their projects. But to simplify teaching, a Scratch Teacher Account provides necessary classroom management tools. It allows educators to manage classes, invite students, and create studios.
Why Should I Register for a Scratch Teacher Account?
Before you start your first Scratch lesson, request a Scratch Teacher Account. It is a straightforward process that does not take long to complete. Once it is operational, sign into Scratch and create a class. There are multiple ways to add students. You can type each one individually, invite students to make their own accounts, or upload a premade csv file of student names and passwords. Refer to the illustrated, step-by-step Scratch Teacher Accounts Guide for instructions. Or if you prefer, watch the informative Scratch Teacher Accounts Video.
You might think that you don’t need a Scratch Teacher Account since your school already provides a Learning Management System to keep track of student work such as Google Classroom. However, Scratch offers unique features that enhance learning.
Here are a few reasons to register for a Scratch teacher account.
- Supervise student usernames and reset passwords: As the administrator, you can set appropriate and private usernames, help with forgotten passwords, and manually change a student password. Scratch provides a pdf template for ease of tracking student data.
- Set up multiple classes: If you teach more than one class, or want to group students, you can establish separate classes. You can also ‘end a class‘ to disable students from logging in. Or, re-open a class at any time.
- Monitor student comments: While you cannot disable the commenting feature generally, you can selectively turn off the ability for others to leave comments on student profiles and individual projects. If an inappropriate comment is posted by one of your students, you can manually remove it.
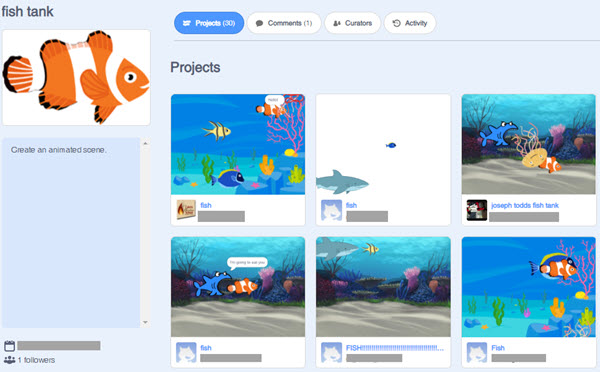
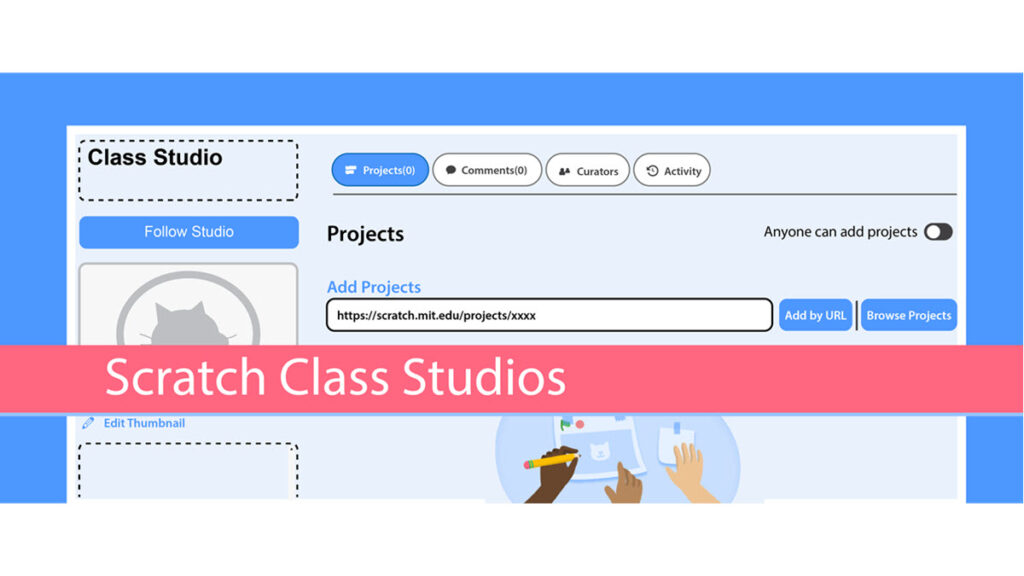
- Organize student work in Class Studios: Teachers can create Class Studios. A studio is a virtual bulletin board that can be used to connect to student work. Since each studio has a unique URL, it is effortless to showcase projects by sharing the collection with students, other classes, or parents.
About Scratch Class Studios
One of the main advantages of a Scratch Teacher Account is that you can add Class Studios. As mentioned, a studio is a collection of student work. Each is unique. Every studio has a URL, title, icon, and description. The collection of Scratch projects display as thumbnails, that when clicked, allow the visitor to play the creation.

How to Create a Class Studio
- Sign into Scratch
- Click your profile name in the top right corner.
- Select My Classes from the menu.
- Click Studios.
- Click the New Class Studio button.
- Identify the Studio Name and provide a description. Click the Add Class Studio button.
- Now click on the Studio to edit the thumbnail, add projects, and control commenting.
5 Scratch Teacher Tips for Making Class Studios
There are some pitfalls you can avoid when creating Studios. Below are five essential tips to get you started:
- Name the studio with the lesson or project type. Use a concise title such as Maze, Race, Treasure, or Music. The studio name should tell people about the collection. Also, since the name is displayed in a list when students click the Add to Studio button, you want it to be easily recognizable.
- Use a studio icon that is 200×130. Use the Internet to search for a suitable image. Include the word clipart in the search term. Plus, you might want to use the search engine tools to filter the size to icon.
- Control commenting. When you first make a studio, turn off commenting. This will simplify moderating duties. Instead, only turn commenting on when you are actively teaching or showcasing student work.
- Allow students to add their own projects. Yes, you can manually add projects to a studio. However, a much faster method to curate a studio is to temporarily turn on the Anyone can add projects feature. Now students will see the Add to Studio button below their shared project. To add their work, they just select the correct studio name. Their work will be instantly added to the collection. When everyone has added their work, turn off the Anyone can add projects slider. Now you can easily showcase student work or view a complete portfolio of the lesson – without having to do any work!
- Make a studio for every lesson or project theme. You could always just have one Class Studio to display a culmination of student work at the end of a coding unit. However, another option is to add a studio for each lesson or project topic or theme. This produces a portfolio. In terms of assessment, it is possible to see the growth in learning as you can compare the first Studio with the final Studio. As well, since work is organized into chunks, you can easily showcase student work at the end of each lesson.

5 Reasons to Organize Student Work Using Scratch Studios
So, what makes a Class Studio so great? Can’t you just have students share links to their projects themselves? Or, why not just list links to Scratch projects in a class blog post or shared document? The main reason is simplicity.
There are five main reasons you should use Class Studios:
- Assess Scratch Projects Easily: Studios group all student work in one place. If you are assessing a particular task such as a game or animated story it streamlines opening each project for evaluation purposes. Alternatively, if you are interested in monitoring progress throughout a coding unit, you can shift from one studio to another to notice the growth.
- Learn from Others: A Studio makes it easy for students to view each other’s work. They can access any Class Studio by selecting My Class from the profile menu. Now they can play any Scratch project to gather ideas or study the code to learn about the construction.
- Practice Digital Citizenship Skills: Each Studio has a Comments wall. Visitors can post encouragement or helpful feedback that everyone can see. This is an excellent way to build a digital learning community.
- Celebrate Learning: Every Class Studio has a unique URL. This makes it feasible to share Scratch projects with other classes or parents. Consider posting the link onto a school blog, as part of an email blast, or onto a digital bulletin board. Not only does this showcase students’ achievements, but it also has the benefit of giving students an authentic audience.
- Track Student Work: A Class Studio provides a means to track Scratch progress. You can open any project as it is being coded by the student. This provides a status update. As well, providing coding support is simplified.
Scratch Teacher Tips and TechnoKids
The above Scratch teacher tips come from teachers using TechnoKids projects in the classroom. Every TechnoKids Scratch project includes a Student Workbook and Teacher Guide with lots of helpful tips and suggestions for Scratch beginners. Teach coding skills in a fun, engaging way with these projects for primary, elementary, and middle school grades.

Design silly scenes, feed a pet monster, explore a magical land, race to the finish, and more! Beginners learn to code by building simple scripts in Scratch JR.
Code an animated digital tale. Use Scratch JR to divide a task into steps, sequence instructions, and debug code. Spark an interest in programming.

Students become game developers as they create a collection of arcade games. They use Scratch motion blocks, if-then logic, loops, sound, and variables to design one-of-a-kind activities for their peers to play.
Build a Scratch activity studio including a treasure hunt, maze, silly story, target game and more with Scratch. Develop computational thinking skills and ignite an interest in STEM.


