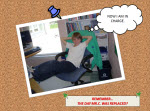
My Grade 6 students just completed their digital scrapbooks. They were made using Microsoft PowerPoint. I loved the activity so much that I am thinking about writing a TechnoKids technology project for the activity. Let me tell you more about it!
It was the final computer class of the school year. We had just finished TechnoClue and I was interested in a quick review activity to fill the last class period. I knew whatever we did, had to be FUN!
NOTE: The TechnoClue project has been a favorite for many years. Unfortunately, it is no longer available. To find other TechnoKids projects view the Project Matrix or visit the TechnoKids website.
I had explored using Web 2.0 tools to create an online photo album but the school network prohibited using online apps. This resulted in my backup plan or PLAN B – to use PowerPoint. At first, I was so disappointed…that was until I experienced the students’ enthusiasm for the task. They LOVED it!

To prepare for class, I had gathered photos taken throughout the school year and placed them into a shared folder. I had also created a sample digital scrapbook.
When the students came into class I wasted no time. I introduced the task, showed the sample, and then offered design and layout suggestions. That was it! They were to use all the skills they had learned throughout the year to complete the task by the END OF CLASS. It was the perfect review activity.
Why PowerPoint was the Right Choice
At first I wanted to use the Web 2.0 Tools such as Smilebox and MyScrapNook. Now I am glad I didn’t. Why?
I now realize the power of a blank PowerPoint slide. It gives students an empty canvas that they can pour all of their creativity onto to transform it from something white and bland, to something colorful and interesting. A template from an online app can’t do that!
The online apps I experimented with were very fun, but the design choices had already been made. This can be limiting.
My students astounded me with their original ideas. For example, one students use a textured background that looked like a corkboard. She then applied a picture style to each picture to make it look like a Polaroid picture. Each image was stuck to the board using a clip art push pin. It looked fantastic!
Another student used an AutoShape to list all of her classmates beside a class photo. She could not have done that with a preset template. I can go on and on about students amazing design and layout choices. I was really impressed by their skillset and the quality of the final product.
Sometimes Plan B turns out to be way better than Plan A.
Technology Skills
As a teacher, it is very rewarding to see my students apply their learning by transferring their skills to a new task. My students were able to design four or sometimes even more slides in only about 35 minutes. Their skillset was impressive! They were able to:
- adjust View settings to preview images in a folder
- toggle between open windows
- insert a new slide and select a suitable layout
- create a title slide
- decorate a publication with clip art
- insert a picture from file
- scale, position, rotate, and flip objects
- apply picture styles to clip art and images
- insert and format WordArt
- draw and format shapes
- add text to shapes
- format text to make it eye catching and easy to read
- apply a slide design and customize the color scheme
- format a slide background and apply it to only one slide
- hide the background graphics on only one slide
- adjust object order
- print a presentation as a handout and adjust the print settings
Making scrapbook pages using PowerPoint was a fun activity and it would definitely be one I would do again.
