
Working with Google Slides and want to include a picture? You have choices!
In this image workshop, there are several ways to insert images into a Google Slides presentation. You can:
- search for a picture online
- upload a picture from your computer
- take a snapshot with a webcam
- link to a photo on the Internet using the URL of an image
- connect to a picture in an existing album
- insert an image from Google Drive

Start by logging in to Google Drive using Chrome. Open your Google Slides presentation.
Click the Insert menu and choose Image or click Image.
A. Search for a Picture Online
- Click Image or from the Insert menu, select Image.
- Choose Search the web from the menu.
- In the search pane, type a search word. Press ENTER.
- Scroll through the pictures until you find one you like.
- Click on it and then click Insert.
B. Insert by Uploading a Picture from Your Computer
- Click Upload from the Insert image box.
- Drag an image to the area indicated or click Choose an image to upload to launch a file explorer window. Navigate to the desired file.

- Click Open.
C. Insert by Taking a Picture with a Webcam
- Click Take a Snapshot from the Insert image box.
TIP: Accept the prompts to allow Adobe Flash Player settings and allow access to your camera. - Take a picture.
- Click to choose the desired photo and then click Select to add it to the information slide.
D. Insert by Choosing a Picture from the Web
- Open another browser tab to search for an image.
- Right click an image. Select Copy image URL.
- Return to the map tab. Click By URL from the Insert image box.
- Right click and choose Paste to add the URL to the path box.
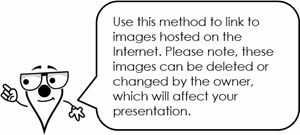
- A preview of the image will appear in the bottom of the window.
- Click Select.
E. Insert from Your Albums
- Click Your albums. Pictures that you have uploaded to Google+ albums will be visible.
- Select an album to choose a picture.

- Click Select.
F. Insert from Google Drive
- Click Google Drive. Pictures that you have uploaded to Google drive will be visible.
- Select a folder or picture.

- Click Select.
Optional Challenge – Crop a Picture into a Shape
- Add a picture to the timeline.
- Select the picture. Click the Mask image arrow.

- Pick a category, then select a suitable shape.

Looking for a technology project to try out the image workshop skills with Google Slides? Check out TechnoMap and TechnoTimeline. Both projects are also available for Microsoft PowerPoint.